
There aren’t too many “one-lift wonders” that may make you epic by delivering a ton of advantages in a single set, however the deadlift is one in every of them. The standard deadlift provides you the potential to elevate numerous weight, get jacked, and brag about your large deadlift PRs (if that’s one thing you’re in to).
Nonetheless, if completed improperly, the deadlift can result in frustration and even damage. Neither of these outcomes are good in your long-term efficiency, not to mention your spinal well being, so it’s time to go over the important thing elements of correct deadlift form. Right here’s what to do and when to do it for a stronger, safer deadlift.
Excellent Your Deadlift Type
Deadlift Setup Suggestions
A powerful and environment friendly deadlift begins earlier than the load even leaves the bottom. Right here’s take advantage of from every particular person repetition.
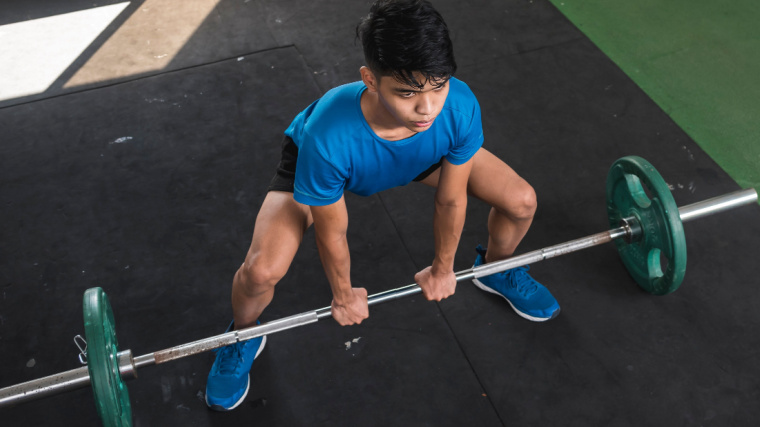
Take Time to Set Your Stance
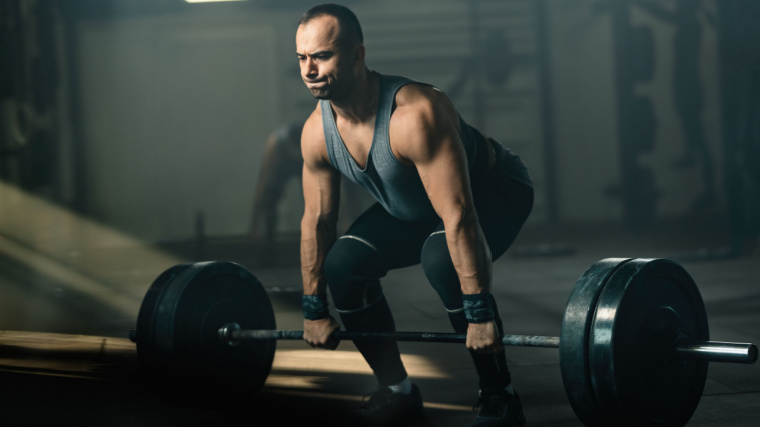
Step one in perfecting your deadlift kind is to method the bar and set your stance. For a typical typical deadlift stance, you need your toes comparatively shut collectively, about shoulder-width. You may make slight changes to have the ability to attain the bar and pull upright whereas protecting good positions at your shoulders, by your again, and into your hips.
Place the barbell immediately over the center of your toes, roughly the place your arches are. Your shins needs to be near the bar, however not touching it. You shouldn’t must roll the bar towards you or away from you earlier than starting the repetition, it needs to be in a great spot from the beginning.
If the bar is in entrance of your toes, will probably be too far out of your centerline and also you’ll have poor leverage to drag the load. If it’s too near your ankles, the bar received’t have the ability to observe a robust, vertical path as a result of your shins and knees might be in the way in which.
Level your toes straight forward and preserve your toes flat on the bottom as you bend right down to grip the bar.
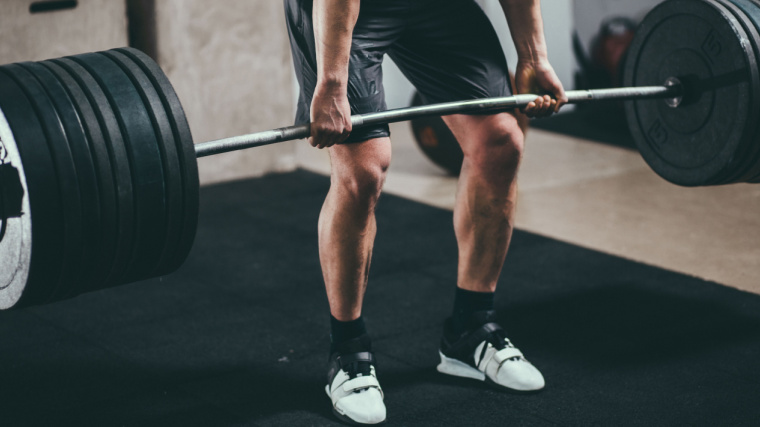
Select the Proper Grip
Your grip is a vital a part of the deadlift because it helps management the load and generate the pressure you want. With no secure grip, you’ll be able to say bye-bye to most of your motor unit recruitment as a result of your grip is the place the place energy transfers out of your physique to the load.
There are 4 grip variations you’ll be able to doubtlessly use, relying in your expertise and targets: the double-overhand grip, the combined grip, the hook grip, and the double-overhand with lifting straps.
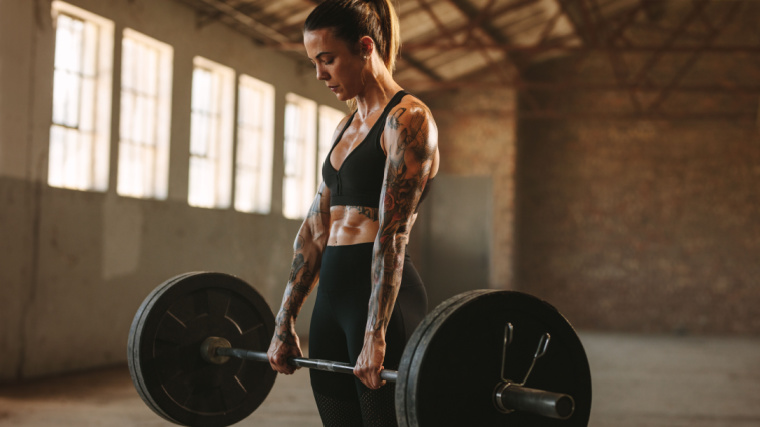
The double-overhand grip includes each fingers gripping the barbell together with your palms going through down. It is a good grip for rookies, because it permits for even distribution of weight throughout your physique and it helps to construct grip power.
That is additionally the commonest grip for many lifters. If you need to use the double-overhand grip, use it. It doesn’t have any important damage dangers and it retains the load of the bar evenly distributed. Nonetheless, some folks may “outgrow” the double-overhand grip as they progress in strength. Then it is likely to be time to make use of a combined grip.
The combined grip includes gripping the barbell with one palm going through down and the opposite palm going through up. These mechanics help you grasp on to extra load. This grip is often utilized by skilled lifters within the gymnasium and aggressive powerlifters, because it permits for a safer total grip and higher management of heavier weights.
Nonetheless, the combined place is inherently unbalanced and also you do put your self in danger for a biceps tear with the supinated (palm up) facet as a result of your elbow joint is extra immediately uncovered to emphasize and the biceps muscle is put into a major stretch. (1) It additionally provides the bar the potential to “spin” or rotate away out of your physique as a result of the pressure isn’t evenly distributed throughout the bar.
In case you’re deadlifting for a number of reps per set, change your combined grip hand place each set and even pausing briefly to flip your grip with every repetition. In case you’re maxing out, hearken to your physique to keep away from a doubtlessly severe biceps damage.
The subsequent various is the hook grip. It is a variation of the double-overhand grip the place your thumb is on the within of your fingers versus the skin. If completed proper, it may be one of many strongest grips in comparison with both a double-overhand or combined grip.
As a result of the hook grip makes use of a double-overhand place, it lets you preserve the load evenly distributed and never have to fret about mixed-grip associated accidents. Nonetheless, one huge disadvantage to the hook grip is that it’s unavoidably painful as a result of the barbell is bearing down on the facet of your thumb. In reality, in case your thumbs or fingers are too small, it won’t even be attainable to hook grip as a result of your fingers want to achieve absolutely across the bar and your thumb.
However hook grippers swear by it, although their thumbs are sometimes taped for help. Nonetheless, it’s an possibility and the consensus amongst avid hook grip followers is that the ache does lower as you adapt to utilizing this specialised grip.
Lastly, you need to use a double-overhand grip with lifting straps. Straps provide most help and help you use the heaviest load, however they take your grip power out of the equation. That is nice for folks with smaller fingers, when their grip is limiting the efficiency of their glutes and hamstrings.
In case you’re not involved with constructing grip power, or for those who’re a aggressive power athlete who can compete with lifting straps (for instance, strongman and strongwoman athletes), utilizing straps is a good possibility with out having the potential damage danger of a combined grip or the required ache tolerance for a hook grip.
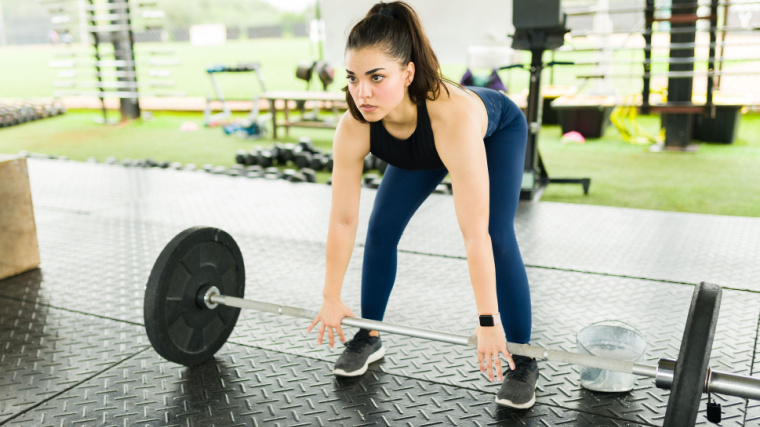
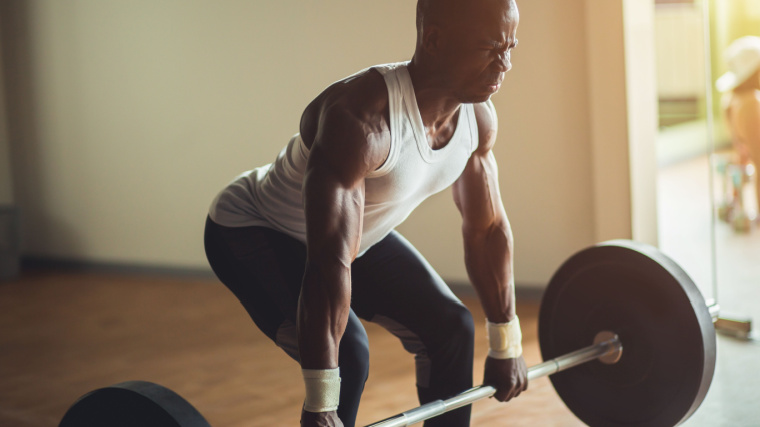
Get Your Physique in Place
When you’ve established your grip and stance, it’s time to focus in your total physique place. Begin by bending your knees barely and “wedging” your hips into the bar, as for those who have been on the brink of sit down in a chair. Maintain your arms straight and get your shoulder blades again and right down to preserve your chest up, relatively than caving ahead.
You need to begin to really feel your physique naturally get tighter resulting from pressure constructing out of your grip, up your arms, throughout your shoulders and higher again, by your torso, and down your glutes and hamstrings.
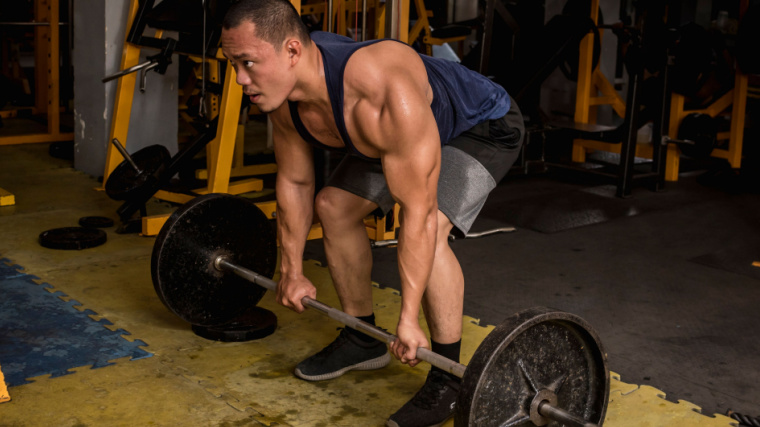
In case you’re not sure about your place, or if one thing feels off, file a quick video or take an image from the facet for some fast suggestions. The highest of your lats (again muscle tissue) needs to be over the bar. Your shoulders barely in entrance of the bar and better than your hips. The bar needs to be near your shins together with your leg barely bent (not in a deep squat place).
In case you don’t really feel tight, think about squeezing oranges beneath your armpits. That messy however correct visualization ought to assist you to cue higher physique tightness the place it’s most wanted — your higher again, shoulder blades, and shoulders.
Think about Switching to Sumo
In case you discover your decrease again is rounding regardless of establishing in an in any other case supreme place, or for those who expertise discomfort in your hips or backbone with typical deadlifts regardless of the way you alter your setup, take into account switching to a sumo stance.
No, sumo deadlifts are usually not “dishonest.” That joke is getting previous and was by no means that humorous to start with. There’s really laborious analysis exhibiting deadlift stance comes right down to your construction. (2)
Based mostly in your torso, femur, and tibia ratios, a sumo stance is likely to be higher suited to you. You’ll have the ability to construct extra power with much less joint pressure by altering your stance. This may imply being weaker at it once you first begin, although. Don’t let a short-term studying curve flip you away from a call that’ll yield long-term outcomes.
With sumo deadlifts, your grip needs to be about shoulder-width, as an alternative of being exterior of shoulder-width with typical deadlifts. Moreover, your stance is wider — together with your toes well-outside your shoulders — together with your toes barely identified. How vast you go relies in your consolation, leg size, and hip mobility.
If you should take a really vast stance, which can compromise your vary of movement, you’ll be able to put a weight plate underneath every foot so as to add a deficit. Aside from the grip and stance being barely completely different, each different lifting cue is identical as the standard motion.
Deadlift Efficiency Suggestions
When you’re in a very good place, out of your fingers to your toes and every thing in between, it’s time to lastly get the load off the bottom. Listed here are some cues for the concentric (lifting) section and the eccentric (reducing section) of the deadlift.
Lifting the Weight
In relation to really lifting the load, there are a number of cues you need to use to make sure correct kind to maximise power and security. Conserving you again in a impartial place ought to go with out saying, since that’s a elementary kind tip to scale back your danger of a decrease again damage.
Deal with driving by your toes and pushing your hips ahead. It will assist activate your quads, glutes, and hamstrings. This two-tiered method, utilizing your toes and hips, will allow you to give attention to probably the most environment friendly approach to produce pressure with good kind.
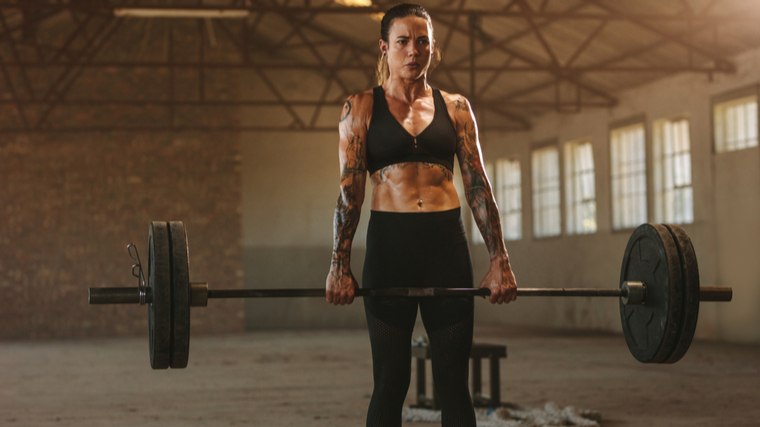
If you already know your method across the gymnasium, a robust deadlift is like leg urgent the bar off the ground — you need to use a robust, flat-footed leg drive to interrupt the plates off the bottom — adopted by a hip thrust into the bar as soon as the barbell crosses above your knees. This allows you to absolutely recruit your glutes to complete with a robust lockout.
Exhale on the prime of the rep once you’ve locked the load, and take an all too transient second to shift focus onto the subsequent section of the repetition — returning the load to the bottom.
Decreasing the Weight
Most individuals slam the weights down shortly on the eccentric portion of the rep. This may be advantageous underneath sure situations, however it comes from the world of powerlifting. In case you are not planning to deadlift in a powerlifting competitors, there isn’t a want to do that.
Typically, you need to decrease with management, not as a result of it’s essentially that a lot safer however, like all train, there’s nonetheless some coaching stimulus through the repetition once you decrease with management. (3) Dropping the load reduces the quantity of labor your muscle tissue are doing and will lower into your potential outcomes.
Decrease the bar as for those who have been doing a Romanian deadlift, protecting the bar near your physique together with your knees barely bent. Feeling your muscle tissue stretch as the load approaches the bottom may even contribute to some additional beneficial properties. (4) It also needs to preserve the bar within the good place on the backside for a simple transition into the subsequent rep.
As soon as the load is on the bottom, let it accept no less than a split-second. Don’t bounce into your subsequent rep. It is not going to stimulate a lot pressure in your muscle tissue and, worse, may result in damage by permitting creating momentum which prevents you from correctly bracing for every repetition.
Brace, Brace, Brace
As a consequence of it’s usually heavy nature, deadlifting efficiency and security hinges in your means to brace. (5) Pun meant. It’s necessary to maintain your core braced from the second you arrange, maintain it into lockout, and keep a very good brace as you decrease the load.
Fortuitously, bracing, or protecting your core tight and secure whereas manipulating the load, is comparatively easy. It comes right down to respiration air into your abdomen relatively than respiration deeply into your chest. As you’re taking a breath in, take into consideration increasing your abs, obliques, and decrease again in 360-degrees.
In case you’re sporting a lifting belt, it’s best to really feel your physique increase “into” the belt. As soon as you are feeling tightness and strain round your whole midsection, keep that tightness as if you’re anticipating to get punched within the abdomen. This retains your backbone in a secure place and helps to forestall your low again from rounding, which will be injurious.
There’s a delicate however essential distinction between bracing your core and easily “flexing your abs.” A braced core is strong from entrance to again and facet to facet, and promotes a secure, sturdy, and secure higher physique. Flexed abs are merely contracted ab muscle tissue in your midsection and might typically encourage a rounded torso place, which is the very last thing you need throughout a heavy deadlift, for the reason that abs are liable for spinal flexion (bending your torso ahead).
Methods to Deadlift
Right here’s a concise evaluation of show most power and effectivity with crisp approach through the typical deadlift.
Step One — Discover Your Stance
The standard deadlift wants your toes roughly shoulder-width aside for a secure and environment friendly platform. If the sumo deadlift feels extra snug, take a stance a lot wider than shoulder-width. In both case, get the barbell over the center of your toes, not in entrance of your toes and never touching your ankles.
Step Two — Choose Your Grip
Except you’re a aggressive power athlete, use a double-overhand grip (each palms down), with or with out lifting straps relying in your must develop grip strength. Squeeze the bar laborious even if you’re utilizing straps. Maintain your arms straight all through your entire train.
Step Three — Brace Your Core
Begin your brace earlier than the load leaves the bottom. Preserve a 360-degree braced core all through your entire rep, through the lifting and reducing phases. A powerful brace will reinforce energy switch out of your decrease to higher physique and assist to maintain your again in a impartial place.
Step 4 — Carry the Barbell
Get tight earlier than the load even leaves the bottom and keep tight all through your entire repetition. Maintain your toes flat and take into consideration performing a leg press to drive the load up. Because the bar passes your knees, imaging doing a hip thrust to activate your glutes and lock out the load in a standing place.
Step 5 — Decrease with Management
After you’ve locked out the load, shortly refocus and decrease the load at a deliberate, not excessively gradual, tempo. Keep away from dropping the load with out pressure. The bar ought to find yourself the place it started, above your midfoot. Pause briefly within the backside to settle the load and decrease momentum. Reset your brace and repeat the method for extra repetitions.
As They Say: Grip It and Rip It
The deadlift can initially really feel awkward, particularly for those who don’t actually know what you’re doing. Even after studying this deadlift approach lesson, it would nonetheless really feel like there are such a lot of cues to consider. However like all train, be taught it proper as an alternative of getting to be taught it twice. With some apply, it should change into second nature. Finally, getting a very good setup will take only a few seconds and resetting between reps will take even lower than that. From there, you’ll be able to construct a large deadlift and dominate the world (or simply hit a PR. That’d be good, too).
References
- Kapicioglu, M., Bilgin, E., Guven, N., Pulatkan, A., & Bilsel, Ok. (2021). The Position of Deadlifts in Distal Biceps Brachii Tendon Ruptures: An Different Mechanism Described With YouTube Movies. Orthopaedic journal of sports activities drugs, 9(3), 2325967121991811. https://doi.org/10.1177/2325967121991811
- Cholewa, Jason M, et al. “Anthropometrical Determinants of Deadlift Variant Efficiency.” Journal of Sports activities Science & Medication, U.S. Nationwide Library of Medication, 1 Aug. 2019, https://www.ncbi.nlm.nih.gov/pmc/articles/PMC6683626/.
- Roig, M., O’Brien, Ok., Kirk, G., Murray, R., McKinnon, P., Shadgan, B., & Reid, W. D. (2009). The consequences of eccentric versus concentric resistance coaching on muscle power and mass in wholesome adults: a scientific evaluation with meta-analysis. British journal of sports activities drugs, 43(8), 556–568. https://doi.org/10.1136/bjsm.2008.051417
- Nunes, J. P., Schoenfeld, B. J., Nakamura, M., Ribeiro, A. S., Cunha, P. M., & Cyrino, E. S. (2020). Does stretch coaching induce muscle hypertrophy in people? A evaluation of the literature. Scientific physiology and practical imaging, 40(3), 148–156. https://doi.org/10.1111/cpf.12622
- Tayashiki, Ok., Maeo, S., Usui, S., Miyamoto, N., & Kanehisa, H. (2016). Impact of stomach bracing coaching on power and energy of trunk and decrease limb muscle tissue. European journal of utilized physiology, 116(9), 1703–1713. https://doi.org/10.1007/s00421-016-3424-9
Featured Picture: Rocksweeper / Shutterstock


